
Build Stronger Wrists, Bigger Forearms, and a Better Grip
Most lifters train their forearms as an afterthought. That is a mistake. If you want complete arm development, stronger wrists and a grip that can keep up with the rest of your body, direct forearm training deserves a plan.
Forearms are usually treated like calves: everyone agrees they matter, but somehow they keep getting pushed to the end of the workout. A few half-hearted wrist curls get thrown in after everything else is finished—assuming there is any time or energy left.
That approach may be enough if your forearms grow easily and your grip is never a limiting factor. For many lifters, however, it is not.
Your forearms connect your hands to virtually every upper-body exercise you perform. They stabilize the wrist when you press, maintain your grip when you pull and transfer force between the implement and the rest of the arm. They are also highly visible. Big biceps and triceps attached to underdeveloped forearms make an otherwise impressive arm look incomplete.
But good forearm training requires more than endless wrist curls. The wrist can flex and extend, move toward the thumb and toward the little finger, and the forearm can pronate and supinate. Grip itself introduces another series of demands. If you want complete development, your training should eventually address more than one movement pattern—and that is exactly what we are going to do.
FOREARM TRAINING IS MORE THAN GRIP TRAINING
Forearm training and grip training overlap, but they are not identical.
Heavy deadlifts, rows, chin-ups, carries and thick-handle exercises can build tremendous gripping strength, but the fact that you can hold a heavy bar does not mean you have fully trained wrist flexion, extension, radial deviation, ulnar deviation, pronation and supination. Conversely, someone can perform plenty of wrist curls without developing exceptional support grip.
Think of grip training as part of the picture rather than the entire picture.
Direct forearm work allows you to deliberately train motions that compound exercises may not challenge sufficiently. It also gives you an opportunity to strengthen the opposite side of the forearm instead of repeatedly emphasizing whatever tissues dominate your regular lifting.
That becomes particularly important with wrist extension. Plenty of lifters train wrist flexion, whether intentionally through wrist curls or indirectly through gripping, but the extensors often receive considerably less direct attention.
The solution is not to perform hundreds of random forearm exercises. It is to select good movements, execute them correctly and rotate them intelligently.
WRIST CURLS ARE ONLY PART OF THE PICTURE
There are six basic movement patterns worth understanding when planning direct wrist and forearm work:
- Wrist flexion — bending the palm toward the forearm.
- Wrist extension — moving the back of the hand toward the forearm.
- Radial deviation — moving the hand toward the thumb side.
- Ulnar deviation — moving the hand toward the little-finger side.
- Pronation — rotating the forearm so the palm turns downward.
- Supination — rotating the forearm so the palm turns upward.
Radial and ulnar deviation are frequently ignored, yet I have long included them periodically as part of a more complete approach to wrist and forearm development.
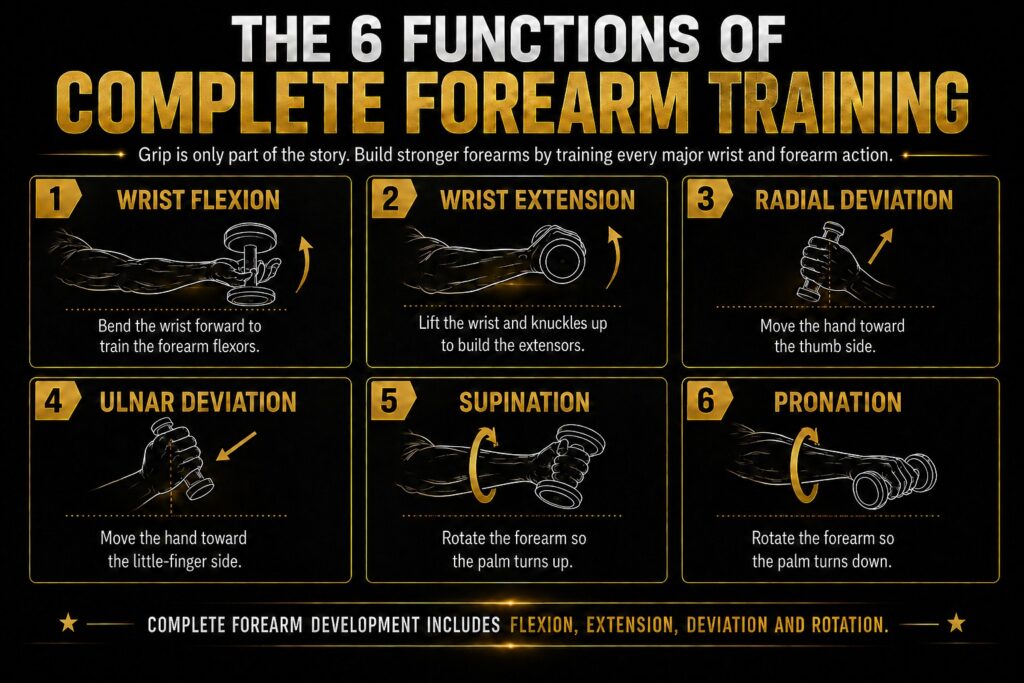
The point of the infographic is not to suggest that every movement needs to be trained in every workout. Quite the opposite. Trying to cram every possible forearm exercise into one session would defeat the purpose.
Instead, think long term.
Train the movements. Rotate the exercises. Keep progressing.
HOW TO PERFORM A WRIST CURL PROPERLY
A wrist curl is simple, but simple does not mean foolproof.
Whether you are using a dumbbell, barbell, cable or specialized device, the objective is to move primarily at the wrist. Once the elbows, shoulders and torso start contributing significantly, the exercise becomes something else.
For a traditional wrist curl, support the forearms securely and position the hands so that they can move freely through a comfortable range. Lower the resistance under control, allow the wrist flexors to lengthen and then curl the hand upward by flexing the wrist. Avoid jerking the weight or turning a small-joint isolation exercise into a full-body effort.
A reverse wrist curl uses the same principle in the opposite direction. With the palms facing downward, extend the wrists to raise the back of the hands. Because the wrist extensors are generally not capable of handling the same loads as the flexors, expect to use less resistance.
That is not weakness. That is anatomy.
Do not judge the quality of a reverse wrist curl by the number printed on the dumbbell.
Judge it by how well the intended muscles are doing the work.
POSITION CHANGES THE EXERCISE
One of the easiest ways to create variation without abandoning the basic movement is to change where the forearm sits in relation to the body.
Years ago, I demonstrated high- and low-platform wrist curls for exactly this reason. Sitting higher, with the hips above the knees, shifts the emphasis toward the contracted portion of the movement. Sitting lower, with the hips below the knees, increases the challenge in the stretched position.
That gives us an important programming lesson:
You do not always need a completely different exercise. Sometimes you simply need a different position.
This is one reason adjustable platforms can be useful. Instead of forcing every lifter into the same setup regardless of limb length or mobility, you can modify the height and find a position that creates the effect you want.
The same principle applies to cables.
In Two Wrist Curl Exercises You’ve Never Tried, I demonstrated high- and low-pulley variations that maintain cable tension throughout the movement. The high-pulley version positions the elbows in substantial flexion, helping minimize assistance from the elbow flexors, while the low-pulley version provides a cable-based alternative to the classic behind-the-back wrist curl.
Different tool. Same muscles. Different stimulus.
THE BEHIND-THE-BACK WRIST CURL
The Standing Behind-the-Back Wrist Curl is one of the simplest variations in the entire forearm arsenal.
Hold a barbell behind your body and curl the wrists upward under control. The position makes it difficult to create much useful momentum and produces a strong contraction through the forearm flexors.
It is uncomplicated, requires almost no setup and works particularly well when you want a wrist-flexion variation that feels different from sitting with the forearms supported across the thighs.
Do not confuse simplicity with inferiority.
An exercise does not need twelve adjustment knobs and a patent number to work.
On the other hand, every once in a while a specialized tool does come along that solves a real problem.
Which brings us to The Formulator.
THE FORMULATOR: GONE, BUT NOT FORGOTTEN
If you have followed my material for long enough, you probably remember The Formulator.
This unusual forearm device locked directly onto the hands, reducing the degree to which the thumb and conventional grip became the weak link. That made it particularly useful for isolating wrist movement rather than having the set end because you could no longer hold the implement.
Unfortunately, The Formulator has disappeared again and, as far as I know, is no longer commercially available.
Thankfully, mine is still alive.
In the video below, I am performing reverse wrist curls with The Formulator, targeting the wrist extensors. Watch how little movement occurs anywhere other than the wrist. The forearms are supported, the device remains secured to the hands and the resistance is controlled through the complete repetition.
The lesson is more important than the equipment itself.
The Formulator was useful because it helped isolate the intended action. If you do not own one—and almost nobody does anymore—you can still reproduce the principle.
NO FORMULATOR? FORMULATE YOUR OWN
I have demonstrated a practical cable alternative in the past using adjustable stirrup-style handles with hand supports.
Attach the supported handles to a low pulley, secure the hands, brace the forearms against the thighs and perform the wrist movement from there. The setup recreates one of The Formulator’s main benefits: the ability to concentrate on moving the wrist without conventional gripping becoming the limiting factor.
Is it identical to The Formulator? No—and it does not need to be. The objective is to reproduce the training function, not the piece of equipment itself. One of the themes I have returned to repeatedly over the years is that good equipment may disappear, but a little weight-room ingenuity usually gives you another way to create the same training effect.
Train the function, not the gadget.
THE WRIST ROLLER DESERVES A PLACE IN THE ROTATION
The wrist roller is another old-school forearm tool that can be excellent when it is set up properly.
The conventional version is often performed with the arms extended in front of the body—or worse, held high for an extended period. The problem is obvious: the shoulders may fatigue before the forearms receive the training effect you wanted.
My preferred solution is simple: take the shoulders out of the equation as much as possible.
A low-pulley wrist roller allows the arms to remain closer to the body while the forearms do the work. That is the reasoning behind The Wrist Roller Solution.
Another option is the Wrist Roller Exercise on a High Step. The elevated position increases the available travel, and rather than obsessing over an arbitrary number of revolutions, I like using time. Sixty seconds is a useful target: keep working until the clock says the set is over.
That creates a very different stimulus from a traditional set of wrist curls.
And that is exactly why it belongs in the rotation.
THE FOREARM PERIODIZATION BLUEPRINT
This is where all of these exercises begin to make sense. You could walk into the gym and perform five different forearm movements every workout, or change exercises randomly whenever you become bored, but neither approach is necessary.
In Wrist Roller Extension and Flexion, I laid out a simple exercise rotation that pairs wrist-flexion work with reverse-wrist-curl or extension-oriented work. The sequence includes dumbbells, barbells, different bench/platform positions, radial and ulnar movement, cables, The Formulator, wrist rollers and forearm rotation.
The original sequence is:
Wrist Curl / Flexion Side
- Seated Dumbbell
- Seated Barbell
- Incline Dumbbell
- Wrist Roller — High Platform
- Ulnar Flexion
- Seated Cable
- Decline Dumbbell
- Standing Barbell Behind-the-Back
- Wrist Roller — Low Pulley
- Cable Supination
Reverse Wrist Curl / Extension Side
- Seated Dumbbell
- Seated EZ-Bar
- Incline Dumbbell
- Wrist Roller — High Platform
- Radial Flexion
- Seated Cable
- Decline Dumbbell
- Seated Formulator
- Wrist Roller — Low Pulley
- Cable Pronation
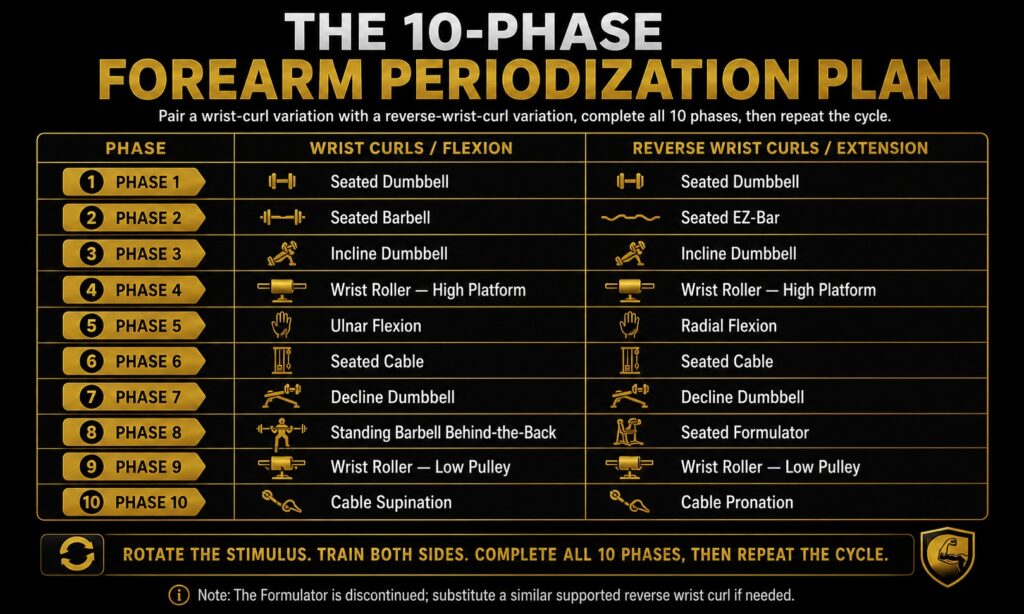
The beauty of the plan is that you are not throwing away wrist curls every few weeks and searching for a new trick. You are maintaining the same general training objective while changing the position, implement or movement pattern.
The muscles continue to receive direct work, but the exact stress is periodically altered.
That is variation with a purpose.
PHASE 1 — SEATED DUMBBELL WRIST CURLS
Start with the simplest version. Dumbbells allow each side to work independently and give the wrists freedom to find a natural path.
Pair conventional seated dumbbell wrist curls with seated dumbbell reverse wrist curls. Establish strict technique and make every repetition look the same.
This is the baseline.
PHASE 2 — BARBELL AND EZ-BAR
Move to a straight bar for wrist flexion and an EZ-bar for reverse wrist curls.
The bilateral setup allows you to load the movement differently while the angled EZ-bar can provide a more comfortable hand position for extension work. Do not turn the extra stability into an excuse to pile on weight and shorten the range.
The wrist is still the joint we are trying to train.
PHASE 3 — INCLINE DUMBBELL
Changing the support angle alters the relationship between the forearm, gravity and the resistance.
Use the incline position for both flexion and extension and pay attention to the stretch and control at the bottom. The movement remains familiar, but the feel changes considerably.
That is enough variation.
PHASE 4 — WRIST ROLLER, HIGH PLATFORM
Now move away from traditional repetitions and use the wrist roller.
The high-platform setup provides more distance for the load to travel and is ideal for timed work. This phase introduces a muscular-endurance component while still training flexion and extension dynamically.
It also provides a nice psychological break from counting repetitions. Sometimes you count reps; sometimes you watch the clock. Both approaches can produce a very effective forearm-training stimulus.
PHASE 5 — ULNAR AND RADIAL DEVIATION
This is where the program starts training movement patterns most lifters completely ignore.
Perform ulnar deviation toward the little-finger side and radial deviation toward the thumb side. These movements use a small range, so control is more important than impressive loading. Do not turn them into elbow or shoulder exercises; keep the arm stable and let the wrist do the work.
PHASE 6 — SEATED CABLE WRIST WORK
Cables change the resistance profile and provide continuous tension through the movement.
Perform seated cable wrist curls and reverse wrist curls with the forearms firmly supported. Because the cable can pull from different angles, take the time to position yourself properly before adding load. Get the setup right first; add resistance second.
PHASE 7 — DECLINE DUMBBELL
The decline position changes the loading angle again and gives you another useful way to attack both wrist flexion and extension without abandoning the basic movement.
By this point in the sequence, you will have trained the same general muscles with several different resistance profiles and body positions.
That is the point.
PHASE 8 — BEHIND-THE-BACK & THE FORMULATOR
For wrist flexion, use the standing behind-the-back barbell wrist curl.
For extension, this is where I originally placed the seated Formulator reverse wrist curl—the same exercise demonstrated in the new video above.
If you do not own a Formulator, substitute a supported cable version, a reverse wrist curl using hand-support handles, or another extension movement that minimizes grip limitation.
The device may be extinct. The movement is not.
PHASE 9 — WRIST ROLLER, LOW PULLEY
Return to the wrist roller, but change the setup.
The low-pulley variation reduces the degree to which shoulder endurance interferes with the exercise and lets you concentrate on the forearms.
The same tool now produces a somewhat different training experience simply because you changed where the resistance is coming from.
PHASE 10 — SUPINATION AND PRONATION
Finish the rotation with forearm rotation.
Cable supination turns the palm upward against resistance. Cable pronation turns it downward.
These movements complete the sequence nicely because they train an action that wrist curls and reverse wrist curls do not address directly.
Once Phase 10 is complete, return to Phase 1 and repeat the cycle.
You do not need fifty forearm exercises.
You need enough good exercises to create productive variation over time.
HOW MANY SETS AND REPS?
Forearms respond well to controlled repetition, not sloppy loading.
For conventional wrist curls and reverse wrist curls, a moderate-to-higher repetition range generally works well because the movements are small and the target muscles are relatively easy to lose if momentum takes over. There is little value in turning a wrist curl into a hip thrust because the weight was too heavy.
As a practical starting point, use 2–4 work sets in roughly the 10–20-repetition range, adjusting according to the movement and where the exercise sits in your program. Wrist rollers are better suited to distance or time, and smaller movements such as radial/ulnar deviation and pronation/supination usually reward control more than aggressive loading.
The exact number matters less than one rule:
The final repetition should still look like the exercise.
If your elbows are moving, your shoulders are swinging and your range has disappeared, the set ended several repetitions ago.
IF YOUR FOREARMS ARE LAGGING, STOP TREATING THEM LIKE AN AFTERTHOUGHT
If forearm development is genuinely a weak point, simply adding another set at the end of an exhausting workout may not solve the problem.
Give the muscle group priority.
I have used this strategy when bringing up lagging body parts: train the weak area earlier in the workout when energy and concentration are high, or increase its workload intelligently through staggered sets. In a specialization phase, forearm work can be performed first on selected training days rather than receiving whatever effort remains at the end.
That does not mean you should suddenly perform twenty sets of wrist curls.
Specialization is a redistribution of training resources. If more recovery and volume are going toward a weak area, something else may need to receive less.
That is programming.
COMMON FOREARM TRAINING MISTAKES
Training only wrist flexion. Wrist curls are excellent, but complete forearm training should eventually include extension and the other wrist/forearm actions discussed above.
Using too much weight. A tiny range of motion combined with excessive momentum may look impressive on the stack, but it is rarely impressive training.
Allowing the elbows to move. Unless the exercise specifically calls for movement elsewhere, support the forearms and let the wrists do the work.
Letting grip end every set. In some exercises that is desirable. In an isolation movement for the wrist extensors, it may not be. That distinction was one of The Formulator’s biggest advantages.
Ignoring the extensors. Lifters love flexion because the forearm pump is immediate. Reverse wrist curls may be less glamorous, but they belong in a balanced rotation.
Turning every wrist-roller set into a shoulder endurance test. If your delts are screaming while your forearms are still fresh, fix the setup.
Confusing soreness with progression. Forearm training can create a spectacular pump and plenty of discomfort. Neither automatically means the program is working. Look for stronger, cleaner repetitions and gradual increases in productive workload.
Changing exercises constantly. Variation is useful when it is planned. Random exercise hopping makes progression difficult to measure.
FOREARMS SHOULD SUPPORT YOUR TRAINING, NOT SABOTAGE IT
Direct forearm work should make the rest of your training better, not interfere with it.
If you have a heavy deadlift, row or chin-up session coming the next day, destroying your gripping muscles the night before is probably not brilliant programming. Place direct forearm work where it complements the rest of your week and where enough recovery exists before grip-intensive training.
The same principle applies within the workout. If forearms are a priority, train them earlier while energy and concentration are high. If they are supplementary, place them later in the session. And if heavy pulling requires maximum grip performance, do not pre-fatigue your hands immediately beforehand unless that is deliberately part of the training objective. As always, context matters.
THE BOTTOM LINE
Strong forearms are not built by finding one magical wrist curl. They are built by training the wrist and forearm through appropriate movements, executing those movements properly, progressing the work and periodically changing the stimulus.
Start with the basics. Learn wrist flexion and extension. Add radial and ulnar deviation. Train pronation and supination. Use dumbbells, barbells and cables. Put the wrist roller to work. If you are fortunate enough to own a Formulator, keep it alive. If not, recreate the function with equipment you already have.
Most importantly, stop treating your forearms as an afterthought.
Build stronger wrists. Build bigger forearms. Build a better grip.
The equipment may change. The principles do not.
MORE FOREARM TRAINING RESOURCES
For more detail on the exercises and methods discussed above:
- Wrist Roller Exercise on a High Step
- Two Wrist Curl Exercises You’ve Never Tried
- The Formulator Reverse Wrist Curls
- Standing Behind-the-Back Wrist Curls
- High- and Low-Platform Wrist Curls
- Wrist Roller Extension and Flexion
- The Wrist Roller Solution
- How to Fix Lagging Body Parts: Proven Training Strategies
- The Jon Snow of Forearm Training Equipment
- Muscle Devices and Weight Room Alternatives
- Radial and Ulnar Flexion
- 7 More Advanced Exercise Variations
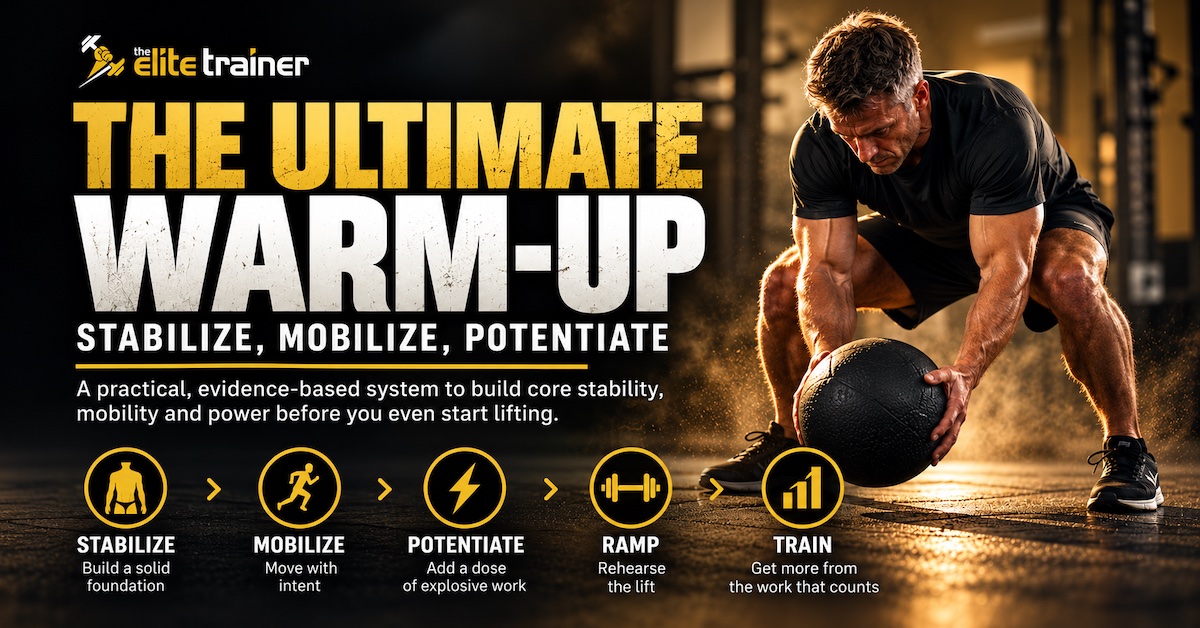
The Ultimate Warm-Up: Stabilize, Mobilize, Potentiate
Most warm-ups either do too little or become workouts of their own. This three-stage system combines core stability, dynamic mobility and explosive potentiation to prepare you for more productive strength training without creating unnecessary fatigue.

How Old Is Your Balance? What the One-Leg Stand Test Can and Can’t Tell You
Can standing on one leg reveal your ‘balance age’? Learn what the one-leg stand test really tells you about aging, fall risk and balance, and why strength still matters.
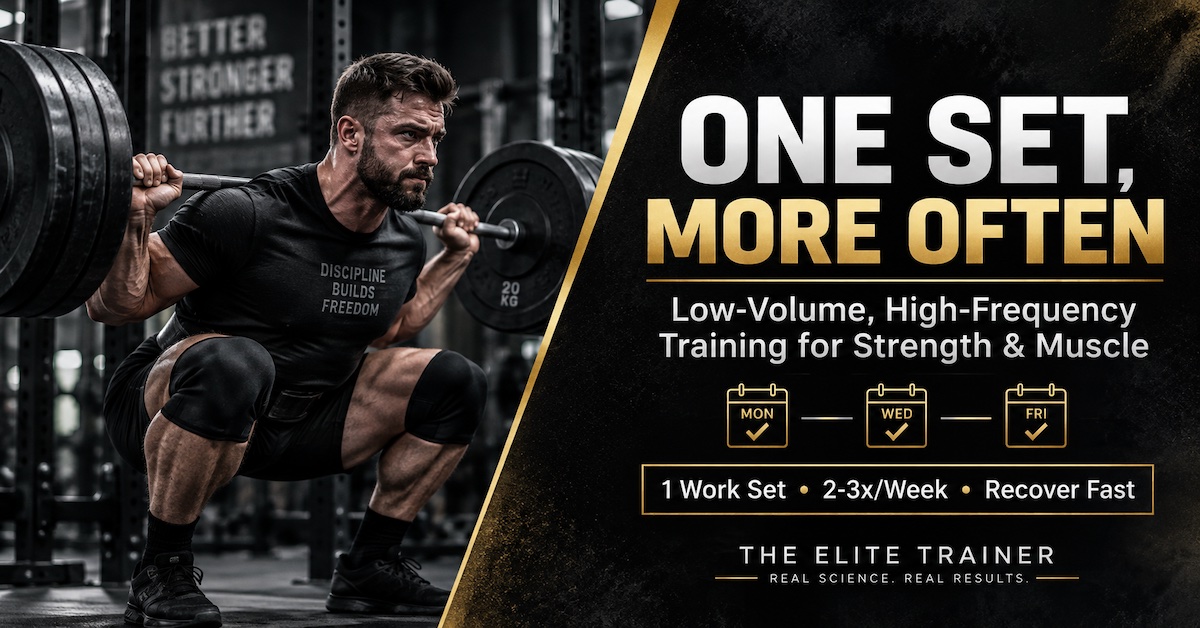
One Set, More Often: The Low-Volume, High-Frequency Method for Strength and Muscle
Can one hard set build serious strength and muscle? Discover how low-volume, high-frequency training uses quality work, faster recovery and frequent exposure to keep progress moving.